Azure Portal Setup
Categories:
The CDM Server supports authentication of users on behalf of Microsoft Azure. In Azure an application needs to be configured which provides the authentication flow.
Step 1: Start with the app registration
Open azure portal in Web Browser and click on App registrations
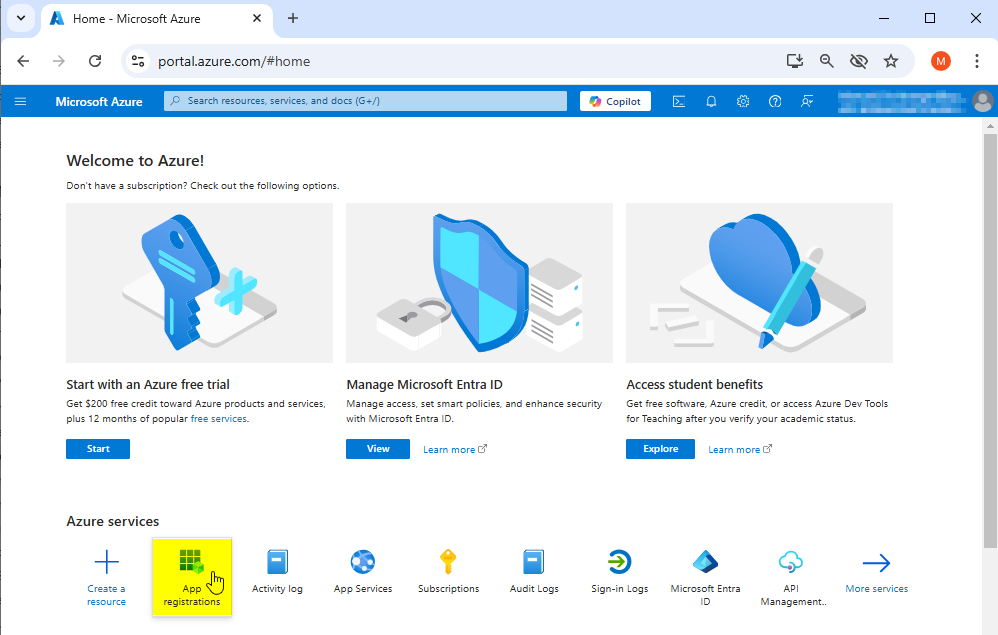
Now the app registrations page shows the registered azure apps.
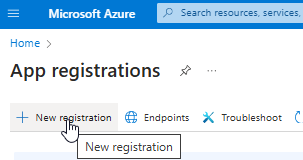
- Click on “+ New registration” to register a new application in azure
An application registration form is shown
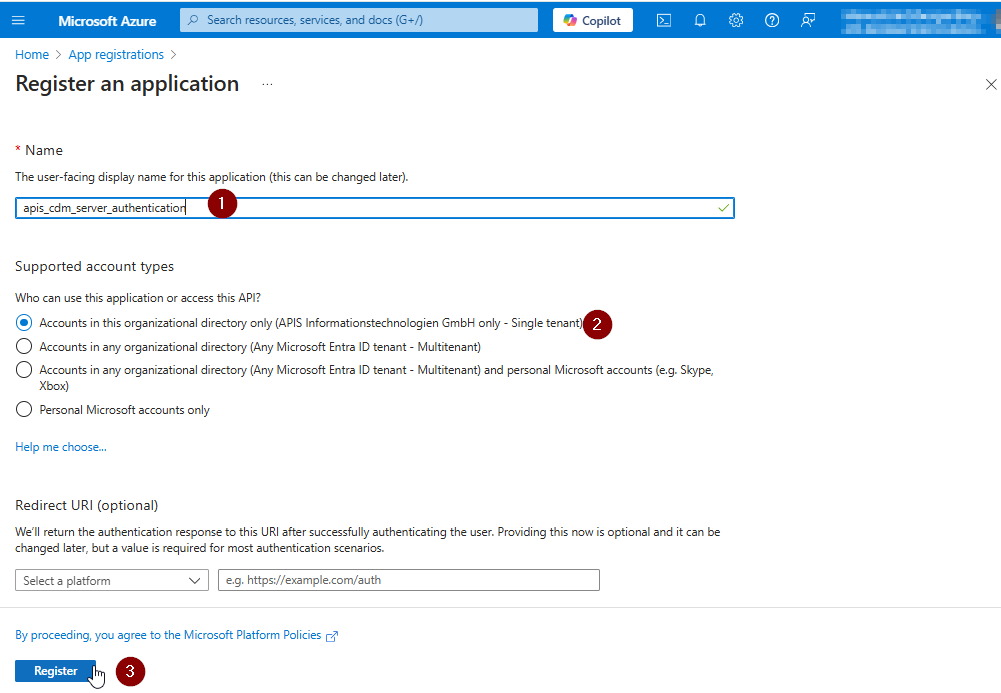
- Enter the mandatory name
- Select a supported account type which matches your requirement
- Skip the step to add redirect URL here for now, we need more than one url, this can be done later.
- Click on Register, you will see the details of the registered app next
Step 2: Configure Application details
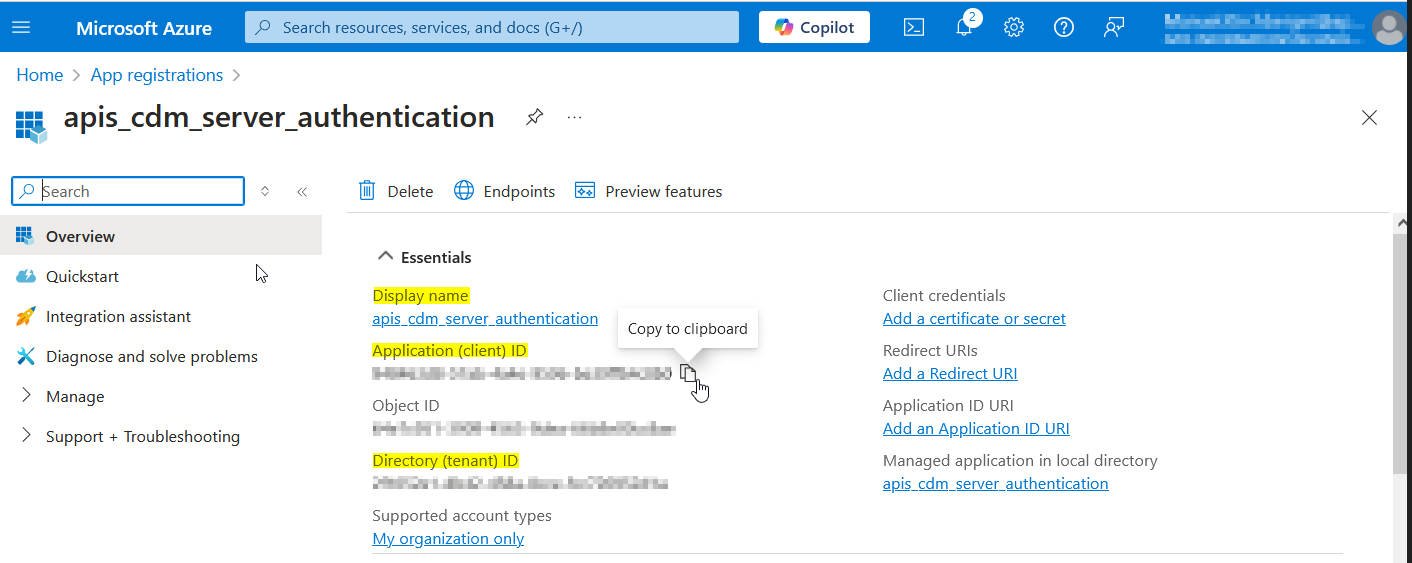
The values of the yellow highlighted fields are necessary for later use in CDM Server configuration. The Ids can be copied moving the mouse pointer to the right end of the value.
Please note the values for the following CDM Parameters for later use:
| CDM Parameter | From |
|---|---|
| AZURE_CLIENT_NAME | Display name |
| AZURE_CLIENT_ID | Application (client) ID |
| AZURE_TENANT_ID | Directory (tenant) ID |
Redirect URIs
Note
Once a user is authenticated by Azure, it sends an authentication information back to the CDM Server. The same happens in the logout workflow. Therefore some Redirect URIs must be defined for the Application.To configure allowed redirect destinations click on Add a Redirect URI on the Application details page.

In the following page click on + Add a platform. As a result a new form opens on the right side where you can select the type of platform.

Choose Single-page application here.

Enter CDM Server redirect URIs for login and logout in the Redirect URIs fields.


Warning
Make sure the URIs here are exact, as mismatched URIs will cause authentication errors.For IQ Client an additional configuration is needed, add a second platform

Choose Mobile and Desktop applications here.
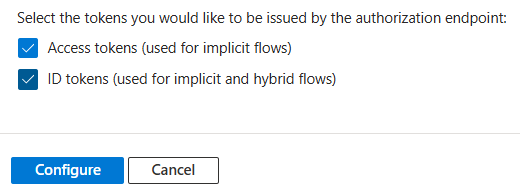
Enter IQ Client redirect URIs for login and logout in the Redirect URIs fields:
Token settings
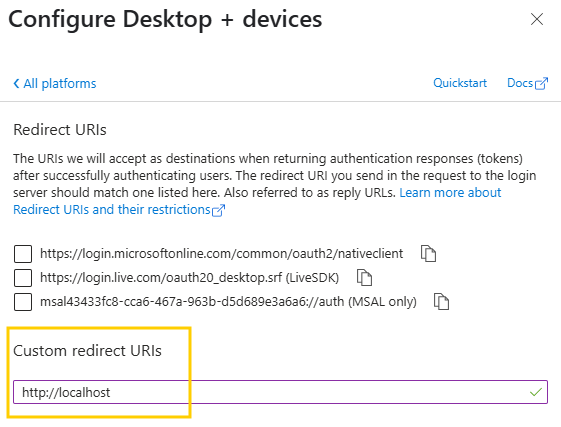
At the bottom of the form enable Access tokens and ID tokens:
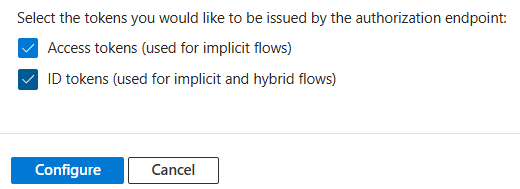
Then click on Configure to finish the configuration.
Application Permissions
In the left menu select API permissions.
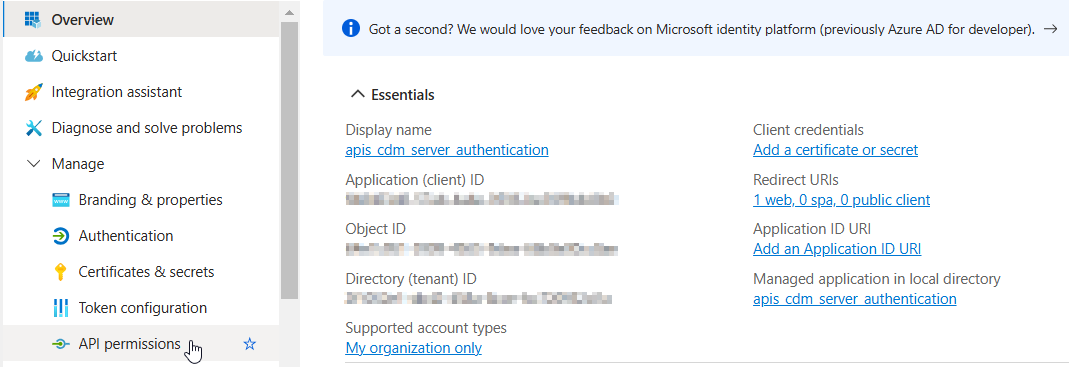
Add Permissions:
Click + Add a permission.

Select Microsoft Graph and then Delegated permissions. Add the permissions
- openid
- profile
- User.Read
- Directory.Read.All
- Group.Read.All
- GroupMember.Read.All
If prompted, click Grant admin consent for the selected permissions. (This step may require admin privileges.)
The result should look like this:
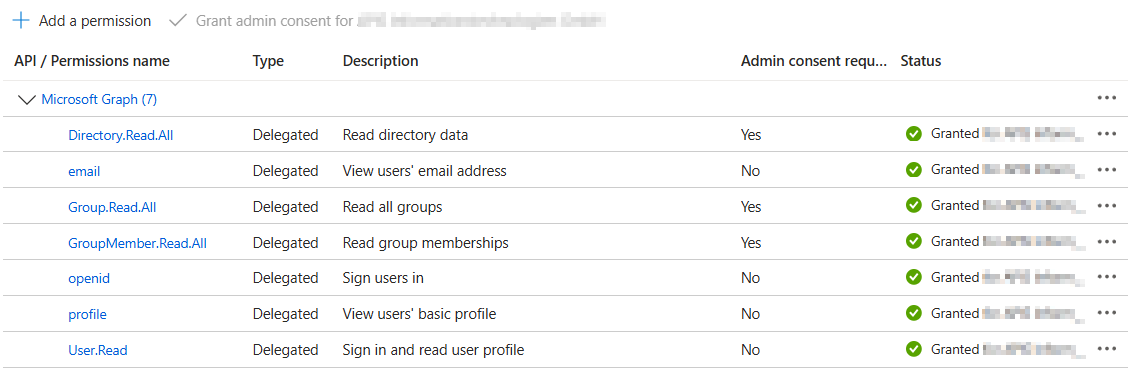
The permissions Directory.Read.All, Group.Read.All and Group.Member.Read.All need Admin consent and are necessary to be able to read members of groups and groups of users which is necessary to provide RBAC flows in CDM Server which are based on group structures in external ID Providers.