Configure CDM-Server
Categories:
Prerequisites
To be able to configure the CDM-Server to start and for later use by members of a configured group, you need some values from the Azure Portal.
Values to collect from Azure Portal
| # | Name | Description | Usage |
|---|---|---|---|
| 0 | ID_PROVIDER | Fixed value “azure” | Environment |
| 1 | AZURE_TENANT_ID | The Directory (Tenant) ID | Environment |
| 2 | AZURE_ADMIN_UUID | The Admin User’s Object ID | Environment |
| 3 | AZURE_LOGIN_GROUP_UUID | The Login Group’s Object ID | Start Config |
| 4 | AZURE_SCOPE | Fixed value “Read.users” | Environment |
| 5 | AZURE_CLIENT_NAME | Name of the application | Environment |
| 6 | AZURE_CLIENT_ID | ID of the application | Environment |
| 7 | AZURE_CLIENT_SECRET | Secret value of the application | Environment |
Collect the values provided by Azure
The ID_PROVIDER for Azure is fixed and must be set to value azure in the environment.
First we will collect the Azure Tenant-ID, an admin user ID and a login group id.
The Admin user is able to log in to a fresh system to configure the necessary base settings.
Log in to Azure Portal
On the Welcome Page below Manage Microsoft Entra ID click on View button
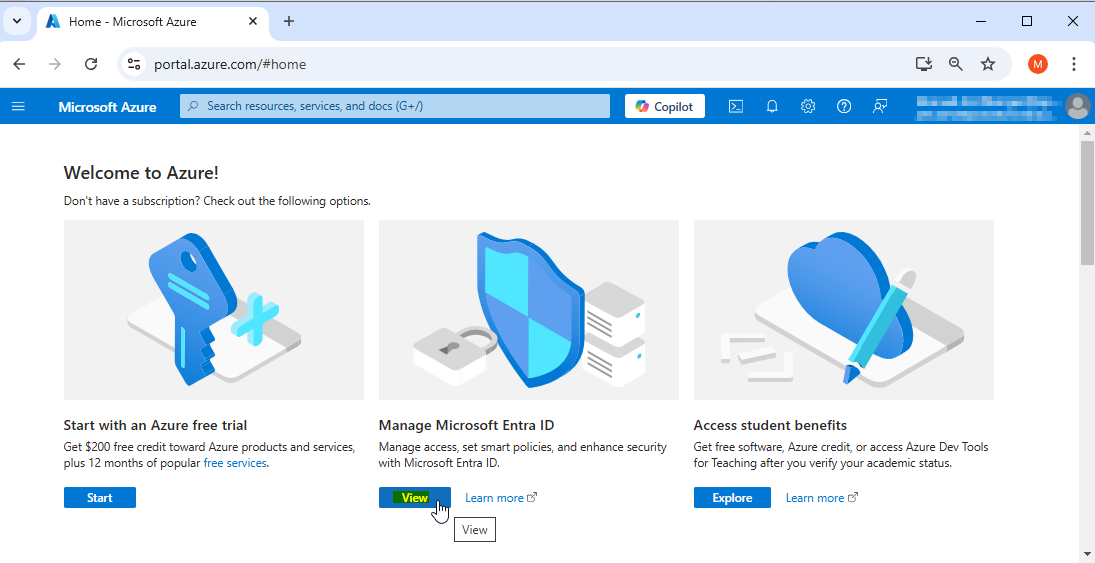
You are now on the welcome page of your Tenant:
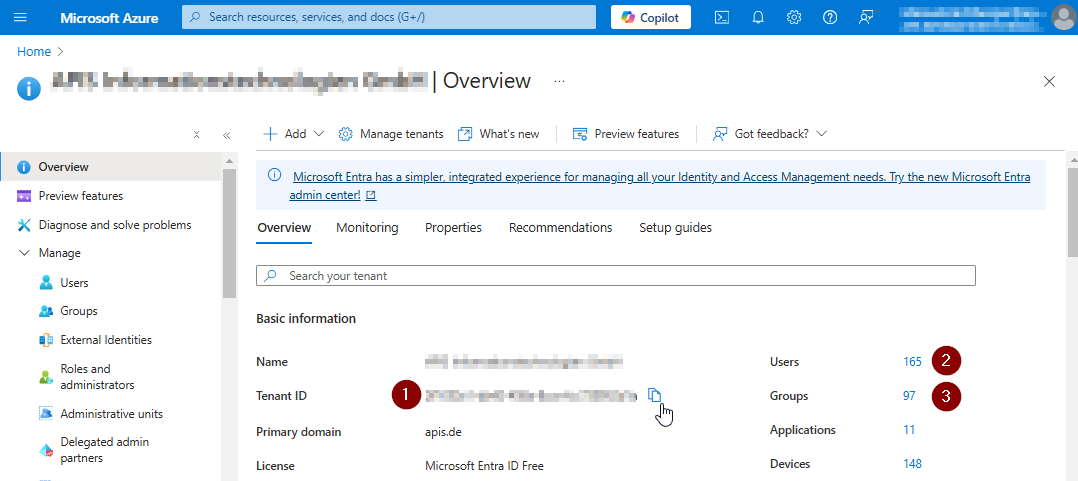
Tenant-ID: You can click on the copy Icon after the value to copy it. Needed for AZURE_TENANT_ID.
Click on the Number link on the right side of Users. In the appearing User list click on the name of the user, which is going to do the initial system configuration, in the column Display name.
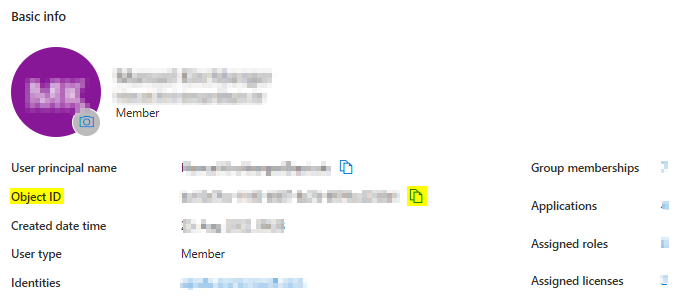 The Object ID value is needed in AZURE_ADMIN_UUID
On the same page you can click on the Number link on the right side of Group memberships. In the appearing list of Groups click on the name of the group which you want to use as login group for all allowed users.
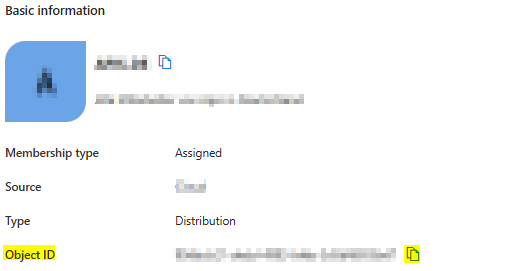
The Object ID value is needed as AZURE_LOGIN_GROUP_UUID. This configuration setting is not part of environment setup, but it’s needed on first start.
- The AZURE_SCOPE value should be set to the value User.read
Go back to Azure Portal Home
Click in the left area menu on App registrations and click on your app to see the details:
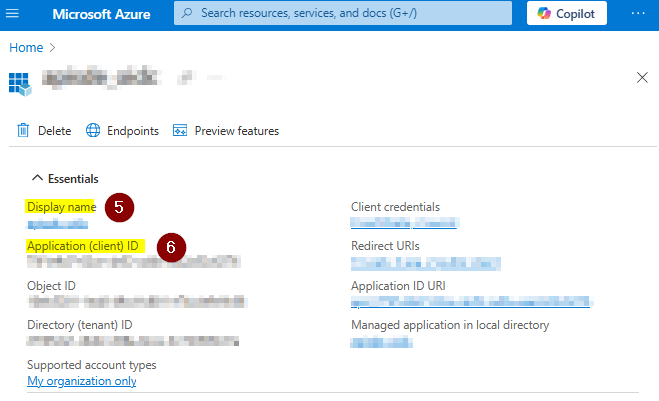
The Display Name value is needed as AZURE_CLIENT_NAME
The Application (client) ID is needed as AZURE_CLIENT_ID
The CLIENT_SECRET is configured in the App details below Client credentials on secret. Its value must be saved for later use when creating it, since it is only readable directly after adding it.
If you missed that and the value is unknown you have to recreate it as described in Azure - Configure Application and save the value as CLIENT_SECRET.
Configure the CDM Server Environment
Go to the instance installation directory and open the .env.idp file with a text editor of your choice. In the file you have to write the parameter names and their assigned values in the schema ID_PROVIDER=azure
Example: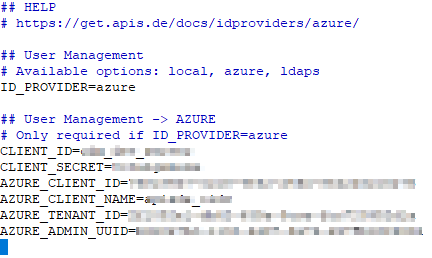
Test the Authentication Flow
Open the CDM-Server web interface and click on Dashboard to initialize the Authentication Flow.
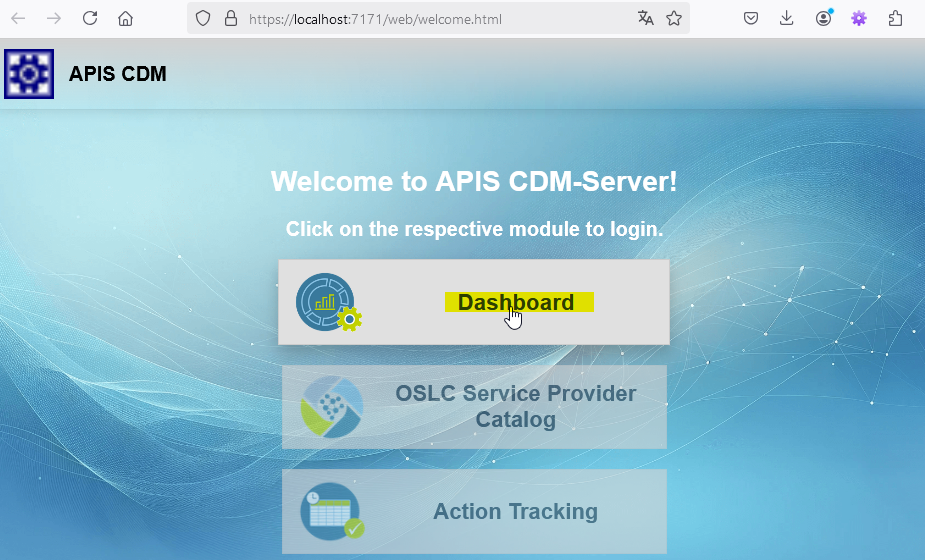
You should be redirected to Azure AD for login. Log in using the credentials of the configured admin user!
After a successful login, you’ll be redirected back to the third-party software. Confirm that the authentication and authorization are working as expected.
Initial startup and configuration
Log in as admin user
Note
If your user is not the declared admin user in the environment setup, authentication will fail!Open the public CDM Server Welcome Page in browser and click on Dashboard to start Azure authentication.
In the popup window enter your azure credentials to login.
If you are the admin user and configuration is completely valid you will get logged in to the CDM Server and the Admin Dashboard is shown.
Configure Login Group
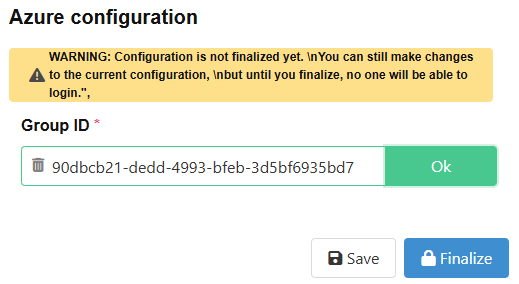
Now add the ID of the group of the azure users which are allowed to log in to CDM Server in the form and click on validate.
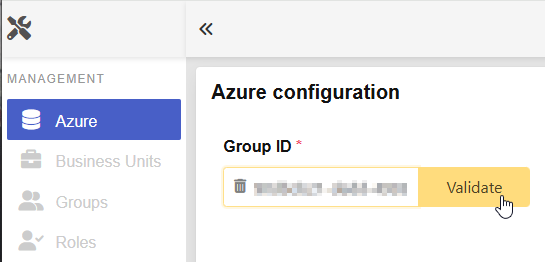
When validation succeeds the validate button changes to green

Then click on the button “Save” to store the initial configuration in the database.

To finally activate the change you have to click the “Finalize” Button. This means the configuration gets locked and is no longer editable. But you have to finalize when you are sure to enable all users in the configured group to log in to the CDM-Server.
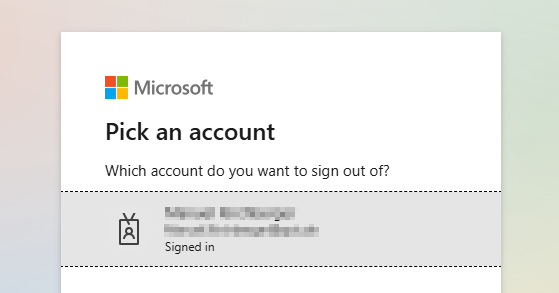
After clicking on finalize you have to confirm that you are sure and want to proceed. Confirm and select your account to log out your current azure session.
In case you logged out your current azure session you get redirected to the welcome screen and all users which are member of the login group can now log in to CDM-Server using Azure.
Possible Error Szenarios
The Login Group ID does not or no longer exist in Azure:
An error message will be displayed and saving the configuration is not possible.Admin user is not member of the login group:
It is not possible to lock out the admin user, in this case an error message gets displayed.
Congratulations!
After succeeding all of these steps the Azure Users which are in the configured group can log in to the CDM Server!
Step 8: Maintain the Application
Periodically review and renew the client secret before expiration.
Adjust permissions or application settings in Azure AD if required by the third-party software or organizational policies.
Warning About Data Loss
Please note that, at this moment, we do not support changing the IdP without clearing all data. This means, if you set up a CDM-Server instance for testing usingLocal or Ldaps for now, you will have to clear all data and start fresh when you want to switch to Azure.Here is a sample .env.idp file with the azure IdP configured:
## HELP
# https://get.apis.de/docs/idproviders/azure/

## User Management
# Available options: local, azure, ldaps
ID_PROVIDER=azure

## User Management -> AZURE
# Only required if ID_PROVIDER=azure

# The Microsoft Azure AD Directory (Tenant) ID
# The Tenant ID is an UUID and contains hexadecimal numbers (0-9a-f) seperated by - and
# can be found in Azure Portal on the Entra-ID welcome page.
#
# Example: "e53f2a45-f4d2-a11d-223a-77b654c12df5"
AZURE_TENANT_ID=

# The Azure Application (Client) ID
# The Application client ID is an UUID and belongs to the application which is configured
# for the authentication and authorization of azure users for CDM Server. The Id can be
# found in Azure Portal -> App registrations.
#
# Example: "53a12b45-1234-5566-8fe4-93b787a787d6"
AZURE_CLIENT_ID=

# The Azure Application (Client) Name
# The Application client Name is a Text and belongs to the application which is configured
# for the authentication and authorization of azure users for CDM Server. The Name can be
# found in Azure Portal -> App registrations.
#
# Example apis_cdm_authentication
AZURE_CLIENT_NAME=

# The Azure Admin UUID
# The Azure admin UUID must be the id of the Azure user who is going to configure CDM Server at first start.
# The user which belongs to the id is then an admin user and the only user which is able to log in to the
# CDM Server to complete the configuration.
#
# To get your Azure user id log in to https://portal.azure.com/ click on view entra and in the page feed
# in the middle area of the entra welcome page the user id is shown.
#
# Example fd163a2f-112a-7291-bdf4-a4325b78910a
AZURE_ADMIN_UUID=