This is the multi-page printable view of this section. Click here to print.
IQ-Software
1 - Connect to CDM-Server
Version
To connect with CDM-Server, you must have at least IQ-Software version 8.0 or later.Step 1: Open the IQ-Software
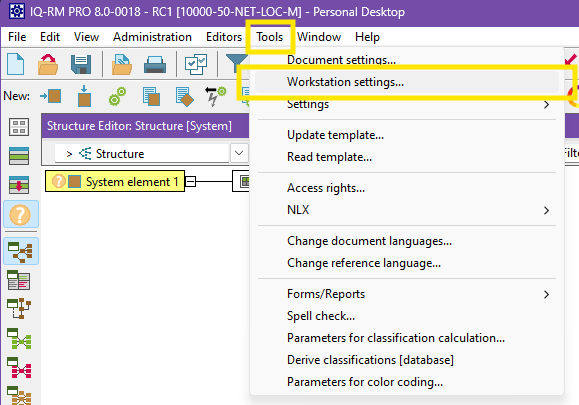
Step 2: (Top Menu) Tools -> Workstation Settings
Step 3: (Left Menu) Server Settings
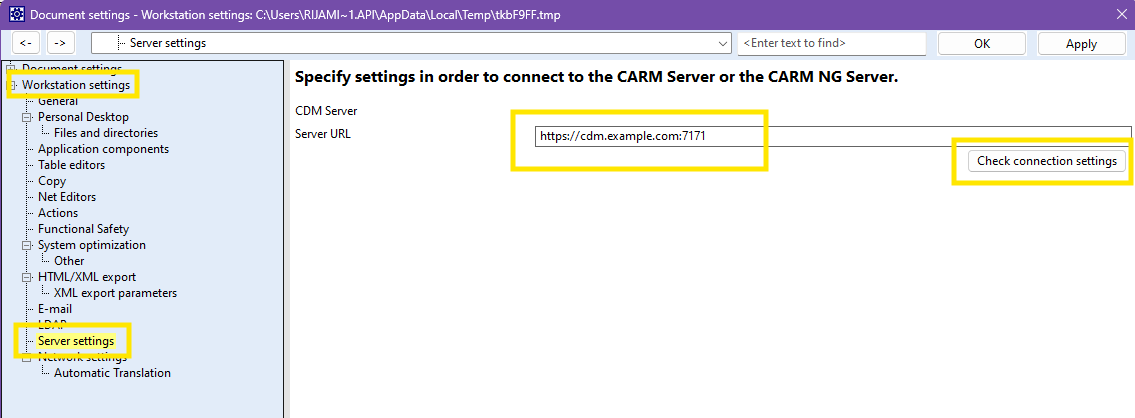
Please enter the Server URL which must include:
https://at start- The domain name part you will get from your administrator
:XYZthe port number at the end
Enable CDM-Server
If theServer Settings entry is not available or there is no possibility to
enter a Server URL for the CDM-Server please enable Application components | CDM-Server, confirm with OK button and reopen the Workstation Settings
dialog.Step 4: Check Connection
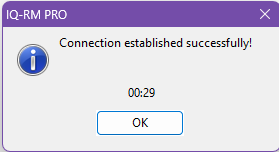
Click on the Check Connection Settings button to verify the connection. You should see the following message box.
Certificate Error
If the CDM-Server has been setup using a self-signed certificate, you will see the following error if the certificate is not installed on your system.
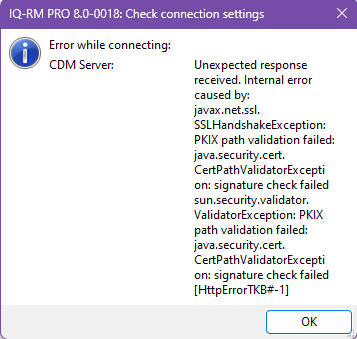
The administrator can install it using group-policy or you can install it manually. Please see Install Self-Signed Certificate for more information.
2 - Login to CDM-Server
After starting the IQ-Software you have to login to the CDM-Server when
performing your first command related to the CDM server (e.g. opening the
Administration | CDM Administration). IQ-Software automatically prompts you
for your credentials. Depending on the configured ID Provider
on your CDM-Server the login procedure varies:
Local
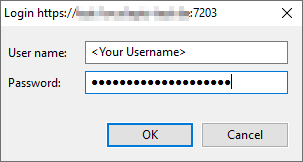
Please enter the your username and your password as set up by your CDM administrator.
LDAPS
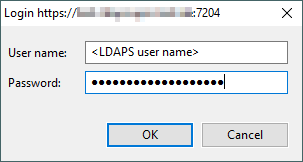
Please enter your LDAPS username and password.
Azure
You are redirected to your webbrowser which shows the Azure Login page (depending on your previous activity one of the following pages will be shown):
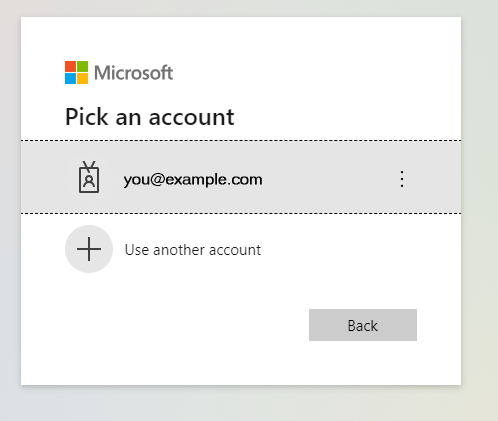 | 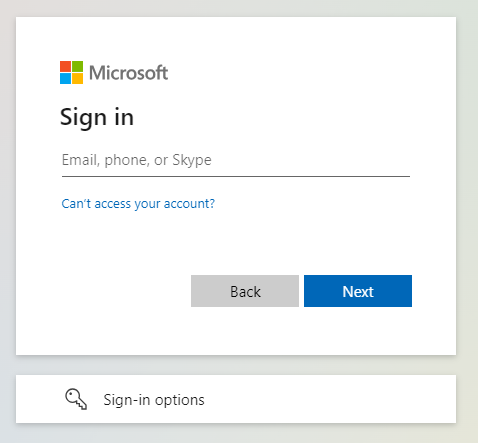 |
Select the account you want to use by clicking on it or providing your account name and clicking Next. Then enter your password on the following screen. After successful authentication, this message is shown in the browser:
Authentication complete. You can close the browser and return to the application.
Now you can close the browser (tab) and switch back to the IQ-Software window.
On subsequent login attempts you might not even need to provide your username and password and are at once redirected to a page showing the above “Authentication complete” message. In this case, simply close the browser (tab) and switch back to the IQ-Software window.
Jazz
Not Supported
IBM Jazz is not supported in the current version of the CDM-Server.Logout
When closing the IQ-Software your login session on the CDM-Server is automatically terminated.
Should you need to log out and log in with a different user while using the
IQ-Software, please use the File | Logout and File | Login menu commands in
the Administration | CDM Administration window.
3 - Managing Projects
The CDM Server manages your IQ-Software data in seperate Projects. Each Project is stored on the CDM-Server in a Business Unit. These Business Units can be nested (one inside another) so that you can create tree-like structures similar to folders and subfolders within a regular file system.
Login on first use
The first time you interact with CDM-Server after starting the IQ-Software client, the software prompts you for your credentials (username/password), see Login to CDM-Server.Uploading .fme Files as CDM-Server Projects
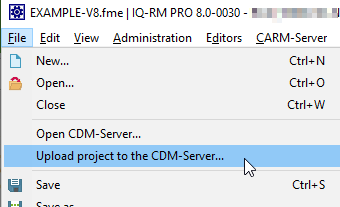
The first step to working with the CDM-Server is to upload an existing project from one of your .fme files:
- Open the .fme file in the IQ-Software
- Choose
File | Upload Project to the CDM-Server... - Choose the Business Unit into which the project should be uploaded
Note that you can only upload a project if the file contains exactly one project. If this is not the case please reorganize the data in the file in this respect.
Alternatively, you can create a new project via context menu directly in the CDM Administration (see below).
Opening a Project from the CDM-Server
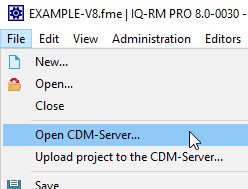
Once there are projects available on the CDM-Server, you can open a project in
the IQ-Software as easy as opening an .fme file:
Choose File | Open CDM-Server... (alternatively you can also use Administration | CDM Administration).
This opens the CDM Administration view, showing you the available Business Units and their projects:
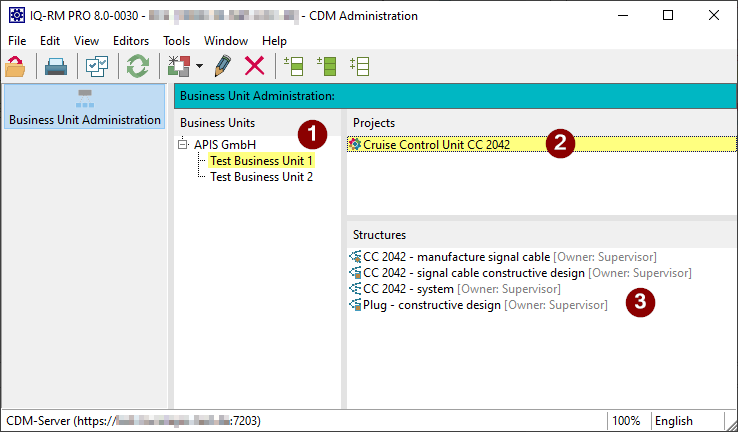
Selecting a Business Unit (1) shows you the contained Projects. When you select a Project (2), the contained structures are shown (3).
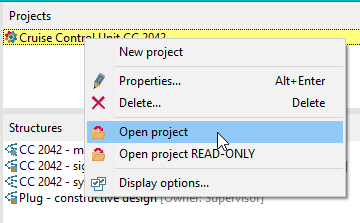
You can open a Project via the context menu or by double clicking it.
Close CDM Administration automatically
If you activate the display optionOptions | Close CDM Administration when opening a project
the CDM Administration is closed automatically after opening a Project.CDM Administration
In the CDM Administration (File | Open CDM-Server... or
Administration | CDM Administration) you can also do the following things
apart from opening a Project:
- Create a new Project or Business Unit
- Change the name of a Project or Business Unit (in multiple languages)
- Delete a Project or Business Unit from CDM-Server
- Move a Project from onen Business Unit to another using Drag&Drop
- Perform an explicit
File | Login...orFile | Logout
Points 1 to 3 are available from the context menu (right-click).